

Adobe Photoshop Quick Tips
 Not all things work like we want in Photoshop. Sometimes we need to find some workarounds to make what we need. While using Photoshop for a while, I gained few tricks in my workflow and today I want to share them with you
Isolate shape edit
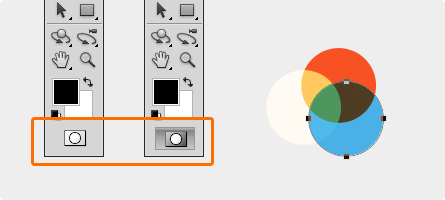 You know these times, when your canvas is filled with bunch of shape layers, and you need to edit one of them, you selecting Direct Selection Tool (A) and then accedently miss your anchor and selecting another shape layer, even it’s locked. Yeah, not cool. But there’s workaround for that. When you refining your shape layer, hit “Q” (quickmask), it’ll lock your layer from others, and you can freely click everywhere on the canvas and move your anchor points. But don’t forget to exit quickmask mode (again hit “Q”), after you finish
How to expand Smart-Object
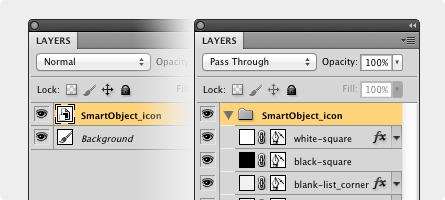 Open your smart object, group everything to the new folder (just to don’t mess your main psd with layers), then select it, go to the Layer → Duplicate Layer, and choose your main PSD. Now you can return to your main file and remove initial Smart-Object
How to scale both layers and styles at same time
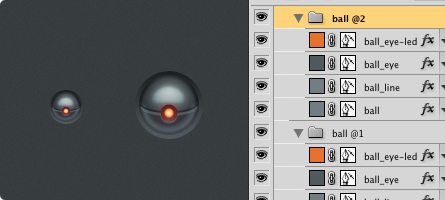 It’s easy to scale whole document with saving proportions of values of layer styles through Image Size with “Scale Styles” option turned on, but what if you need to scale only few layers in document? It is a bit tricky, but here how you can do it:
- Group your layers and using Free Transform Tool (cmd+T) resize them like you want. But don’t apply changes, just memorize values of W/H and cancel it
- Open your Smart-Object, go to Image Size (alt+cmd+I), and paste your values from previous step (make sure that “Scale Styles” checkbox is turned on)
- Expand your Smart-Object, like described in previous tip
5 additional ways to add stroke to layer
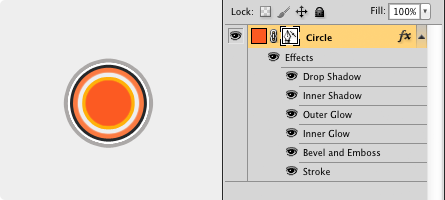 Almost every layer style effect can give you stroke at the result:
- Drop Shadow: crunk up Spread to 100%, then chaning Size will give you outer stroke
- Inner Shadow: Choke to 100%, Size will change width of inner shadow
- Outer Glow: Spread to 100%, Size will change outer stroke
- Inner Glow: Choke to 100%, changing Size will give inner stroke
- Bevel and Emboss: Change Technique to Chisel Hard, Angle to 0˚, Altitude to 90˚, Depth to 1000%, Highlight and Shadow mode to same color. Now via changing size you can set width of your stroke and via changing style to Inner/Outer bevel will change orientation of the stroke
Hide unnecessary menu itmes
 There’s a lot of menus in Photoshop, but not all of them are useful for everyone. So, you can hide things, that you don’t use in Edit → Menus…
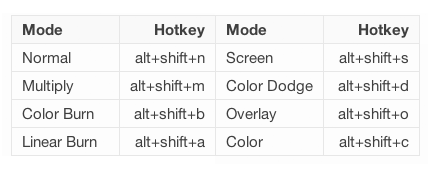
Blending modes hotkeys
There are hotkeys for changing blending modes of layer. Dunno why, but I didn’t used them. Here’s list of most used modes and their shrotcuts:
Custom Hotkeys
 Usually I’m too lazy to setup custom hotkeys for apps, but dealing with layer styles are taking too much time without it. So I have this set of hotkeys:
- cmd+ctrl+c — Copy Layer Style
- cmd+ctrl+v — Paste Layer Style
- cmd+ctrl+x — Clear Layer Style
- cmd+ctrl+t — Scale Effects
- cmd+ctrl+s — Convert to Smart Object
Conclusion
And that list can be continued with numerous of tactics and tricks. But that’s it for today :P
As always, if you have something to say — welcome to comments ;)
Discussion